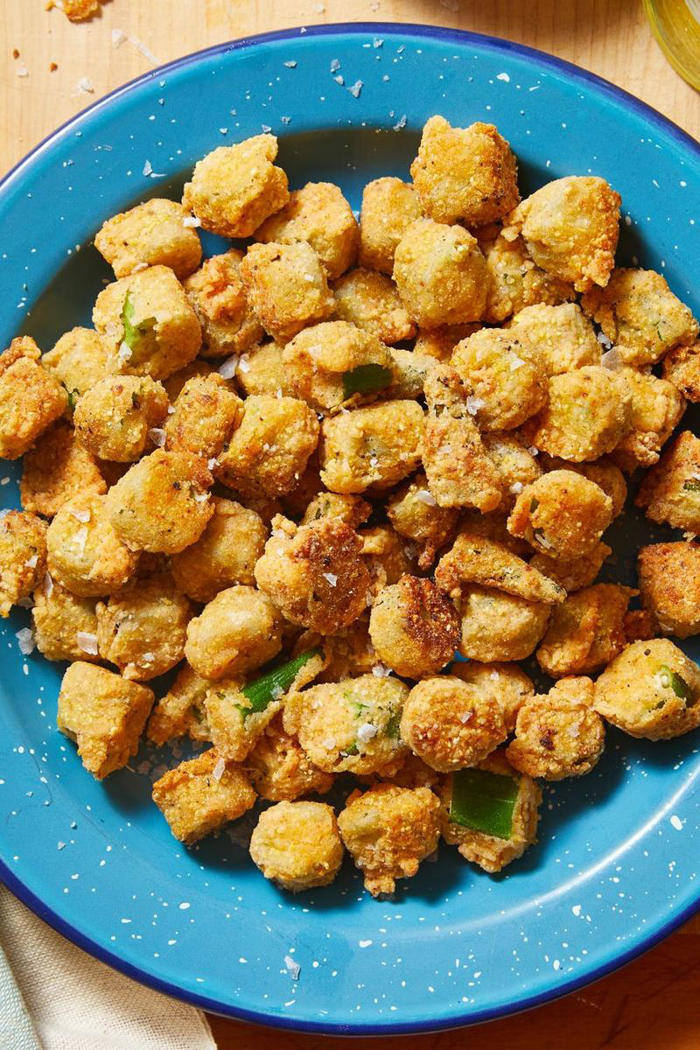
We'll Say It: Crispy Fried Okra Is The Best Way To Enjoy The Veggie
There might not be a more Southern ingredient than okra, and I can totally understand why it’s so beloved—raw, grilled, pickled, or added into gumbo, it adds a delicious texture and takes on flavor to whatever it’s added to. While it’s easy to love this veggie in all its forms, fried okra holds a special place in my heart. When fried, it turns into crispy, poppable bites perfect for dipping in sauce or pairing with your favorite seafood dinner. If you’ve never made okra before, start with these golden, extra-crispy bites—you’ll be a believer in no time.
Yields: 4-6 servings
Prep Time: 10 mins
Total Time: 30 mins
Ingredients
- 1 1/2 c.
all-purpose flour
- 3/4 c.
cornmeal
- 2 tsp.
kosher salt
- 1/2 tsp.
garlic powder
- 1/2 tsp.
paprika
- 1/2 tsp.
freshly ground black pepper
- 1/4 tsp.
cayenne pepper
- 1 1/4 c.
buttermilk
- 12 oz.
okra, stems removed, sliced into 1/2" thick rounds
- 1 c.
vegetable oil, for frying
Directions
- Line a baking sheet with paper towels. In a large bowl, combine flour, cornmeal, salt, garlic powder, paprika, and peppers. Pour buttermilk into a medium bowl.
- Working in batches, toss okra in buttermilk, stirring to coat, then toss in flour mixture, making sure okra is well coated.
- In a medium skillet over medium heat add oil. When oil is hot, work in batches and add okra, making sure to not overcrowd the pan. Fry 8 to 10 minutes, stirring occasionally, to make sure all sides are golden and fried. Drain on prepared baking sheet. Add more oil between batches, as necessary.
Fried Okra
How To Make Fried Okra
Ingredients
- All-purpose flour & cornmeal: These two are what are going to bring that irresistible crunch to the outside of your okra. I haven’t tried this with a gluten-free flour blend or cornstarch, though those might work if you’re trying to keep these gluten-free. When looking for cornmeal, stick to ones labeled “fine” or “medium” ground, as those will work better here than larger ground options like polenta or grits.
- Kosher salt: I like to use kosher salt (rather than iodized or sea salt) in my kitchen because it has a less salty taste, so I never over-do it. If you don’t have it, start with half the amount of whatever salt you do have to guarantee these bites won’t be over-seasoned. Don’t forget, you can always sprinkle a little over them right out of the fryer if you need to for added flavor.
- Spices. These are my preferred, but feel free to swap them in or out for yours. Cajun seasoning, blackening seasoning, or even some Old Bay could all be great here.
- Buttermilk: I personally like to use buttermilk for dredging here because it adds a little extra tangy flavor, helps the flour and cornmeal stick even better than eggs, and ensures an extra crispy exterior, thanks to its added acidity. That said, if you’d prefer to use eggs to coat your okra, that should work too.
- Okra: Ask anyone who loves okra what it tastes like, and you might be hard pressed to find a solid answer: it really is one of those vegetables that tastes solely like itself, and not much else. It’s a little nutty and a little verdant (think grass), which is why it goes so well fried or in a hearty stew. Not sure where to find it? It should show up at your local farmer’s market and grocery stores from summer to fall, and can be found in the freezer section of some stores year-round.
- Vegetable oil: You can really use any neutral oil with a high smoke point that you like here. Vegetable oil is a go-to for me, but peanut oil, soybean oil, sunflower oil, or canola oil will work here too, so use what you’ve got.
Step-By-Step Instructions
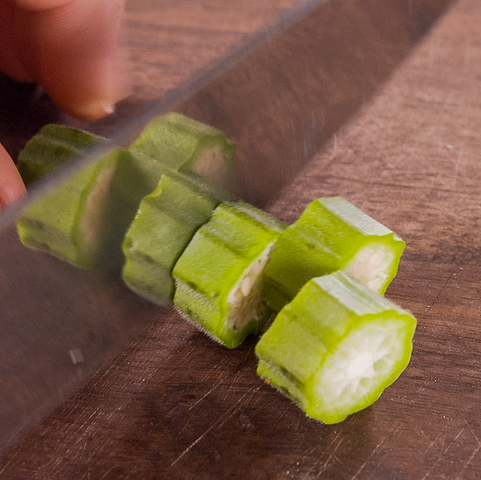
Start by slicing your okra, and placing them in a bowl. You’ll want to try and keep them at about ½ rounds, but if some of your okra are smaller or bigger than others, feel free to adjust by cutting them a little bigger or smaller to match the others.
Fried Okra SBS
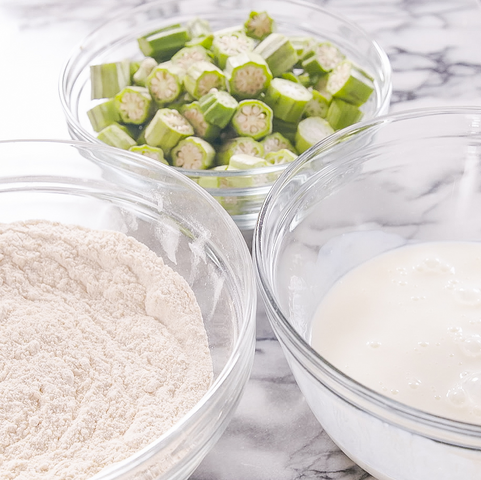
Then line a sheet pan with paper towels to be used later, and set up your dredging station. Combine your flour, cornmeal, and spices into one bowl, your buttermilk into another, and one final bowl to place your fully dredged okra into. My greatest tip for not ending up with hands that look just like your dredged okra at the end of the process? Use one hand as your “wet” hand that only tosses your okra in the buttermilk and then into the flour mixture, and the other as your “dry” hand, which makes sure the wet okra is entirely covered with your spiced flour and cornmeal mixture. It might take a bit of getting used to, but it’s worth it for reduced mess.
Fried Okra SBS
Working in batches, move your okra through the dredging process. Once everything is done, you can begin frying.Add your oil to your pan, and heat it over medium heat until it reaches a temperature of ~375° (use a thermometer if you have one!). If you’re not sure, test it by placing a wooden utensil (think take-out chopstick or wooden spoon) into your oil—if bubbles steadily form around your utensil but don’t go wild, you’re good to go. If they are bubbling so much it’s practically boiling, your oil is too hot, so turn the heat down and wait before testing again.
Fried Okra SBS
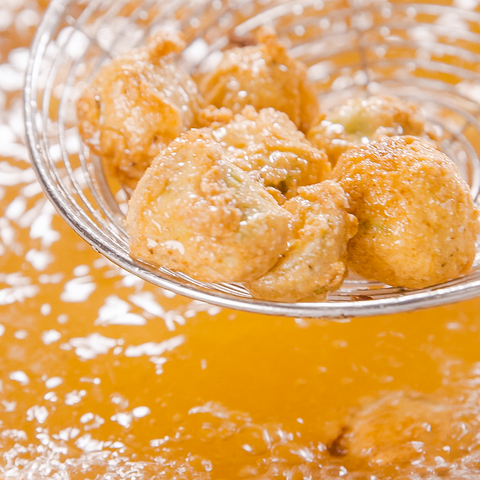
Fry your okra (again, working in batches if you need), stirring occasionally so none of them stick together, until they’re golden and fried. Pull them out with a slotted spoon or spider strainer and let them drain on your prepared sheet pan. Add more oil to your pan and let it come up to heat if you need to between batches.

Fried Okra SBS
Full list of ingredients and directions can be found in the recipe above.
Recipe Tips
How to keep okra from being slimy? Unfortunately, its true: when cut, okra can sometimes turn slimy. Frying your okra over a medium to high heat will already help in eliminating that unwanted texture, but you should also wait to cut your okra until right before you’re about to cook it. Another tip? Try soaking your cut okra in some white vinegar, then patting it dry before frying. This will give your okra a bit more of a pickled flavor, but it should help counteract some of the slime.

Fried Okra - Delish.com
Storage
Because of its crispy coating, fried okra is best enjoyed the day of, but if you have any leftovers, store them in an airtight container in the fridge for around 3-4 days. Reheat in the oven or air fryer for maximum crispiness!
What To Serve With Fried Okra
Made This?
Let me know how it went in the comments below.