How to Take a Screenshot on Any iPhone or Android Phone
Easily capture anything you want to refer to later. James Martin/CNET
There are many reasons you might want to take a screenshot on your phone. Perhaps it’s to save a cool post on Instagram, document the latest fashions for wardrobe inspiration, or maybe it’s to archive a wholesome (or hilarious) text exchange with loved ones.
Whatever the reason, here are several easy ways to capture your iPhone or Android screen. Stretch those fingers, because there are going to be a lot of buttons getting pressed. (Actual buttons, not figurative ones.)
How to take screenshots on iPhone
For iPhones without a home button (any model from the iPhone X and newer), simultaneously press the power button and volume up button. But note that if you press these buttons down for too long, the power off and SOS screen will appear.
When you take a screenshot successfully, you’ll see the screen flash and hear a camera shutter sound (if you’ve got silent mode off). A miniature version of your screenshot will float on the bottom left of your screen. You can tap on it and go into Markup mode to crop, edit or add text right away without having to go into the Photos app first, which is terrific.
If you don’t want to edit your screengrab, you can just swipe the mini version away or wait for it to disappear on its own after a few seconds. By default, your screenshot will save to the Photos app.
iOS will also let you take scrolling screenshots, which let you capture multiple pages in a single snapshot. You can check out our step-by-step guide on that here.
How to take screenshots on iPhone 8 and earlier
If your iPhone has a home button, there’s a different way to take a screenshot. Press the home button and the sleep/wake button at the same time. A mini version of your screenshot will pop up on the bottom left of the screen.
You can tap on it to edit it or share it right away.

The power and volume buttons are on the same side on the Pixel 8 Pro. James Martin/CNET
How to take screenshots on Android phones
Android has a few different ways to capture what’s on your screen. The universal way is to simultaneously hold the power button and the volume down button. The screen will then flash and a smaller version of your screenshot will appear on the display. This will work across devices like the latest Pixel 8 and 8A lineups, as well as the Samsung Galaxy S24 series.
Depending on your phone, an editing window might pop up. Otherwise, the screenshot will disappear off the screen. Screenshots are saved in the Google Photos app, or in your phone’s native gallery app.
Motorola’s three-finger touch method
If you own any recent Motorola phone, like the Motorola Edge Plus or Moto G Power 5G, you can use the power and volume button technique, or a three-finger method. This latter technique happens to be one of my favorite ways to take a screenshot because there’s very much a Vulcan-neck-pinch Star Trek vibe to it.
To enable three-finger screenshot, go into the Moto app, or if you’re on an older Motorola phone, find the Moto Actions menu in Settings. Click on the hamburger menu and go to Moto Actions, then turn on Three Finger Screenshot. You can tap on the description to bring up a quick animated tutorial on how to use it.
Now any time you want to take a screenshot, simply press on the display with three fingers at the same time. The screen will flash and a screenshot editor will appear.
Samsung’s karate chop technique
Perhaps the most interesting way to take a screenshot comes from Samsung. You can, of course, use the Android system way with the power and volume buttons. But there are a couple of other options, one of which involves using the edge of your palm.
To trigger this, hold your hand in a “karate chop” pose (so basically, the edge of your hand is perpendicular to the screen) and drag the side of your hand across the full display. Your phone will then take a screenshot.
To enable this feature, go into Settings and tap the magnifying glass icon. In the search field, type the word “palm” and you’ll see a menu option appear called Palm swipe to capture. Hit the toggle to turn it on.
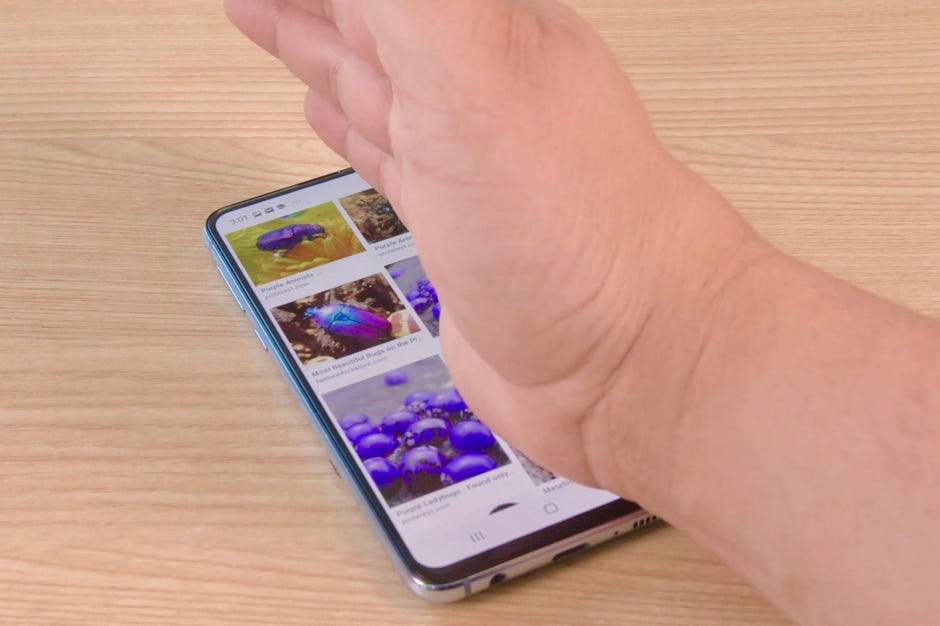
As ridiculous as it sounds, you can take a screenshot on a Samsung Galaxy phone using your palm. Charlie Wagner/CNET
Alternatively, you can go into Settings > Advanced features > Motions and gestures, then find Palm swipe to capture in the list and hit the toggle to enable it.
I’ll admit, this gesture isn’t as reliable as the power and volume button press, but you can do it one-handed by merely grazing your phone’s screen. Plus it’s a fun party trick.
Samsung’s Edge panel lets you take precise screenshots
Samsung didn’t stop with the palm gesture; using the Edge panel on Galaxy phones, you can also take screengrabs with more precision.
To enable the Edge panel, go into Settings > Display > Edge panels. Hit the toggle to turn it on. (Alternatively, search “edge” within Settings and hit the toggle next to Edge panels when it pops up.)
When you click on Edge panels, it’ll take you to another screen with a section called Panels. Click on that, and choose Smart select from among the options to add those capabilities to your Edge panel.
When you want to capture your Galaxy phone’s screen more precisely, open the Edge panel by swiping from the right edge of the display to the left. With the Edge panel open, swipe again through the various panels until you land on Smart select. From there, you can choose a rectangular capture, an oval capture or an animation capture that lets you make a GIF.
After you select how you want to capture the screen, a box or oval will appear. You can resize and reposition the tool over the part of the screen you want to capture, then tap Done. Hit the arrow on the bottom right of the screen to save the image to your Gallery.
17 Hidden iOS 17 Features You Should Definitely Know About
iOS 17 has been out for nearly half a year, releasing in September 2023, and while that’s plenty of time to explore Apple’s latest mobile OS update, there’s always something new to discover.If you want to take a closer look at some of the lesser-known features and settings on iOS 17 right now, here’s what you need to know.
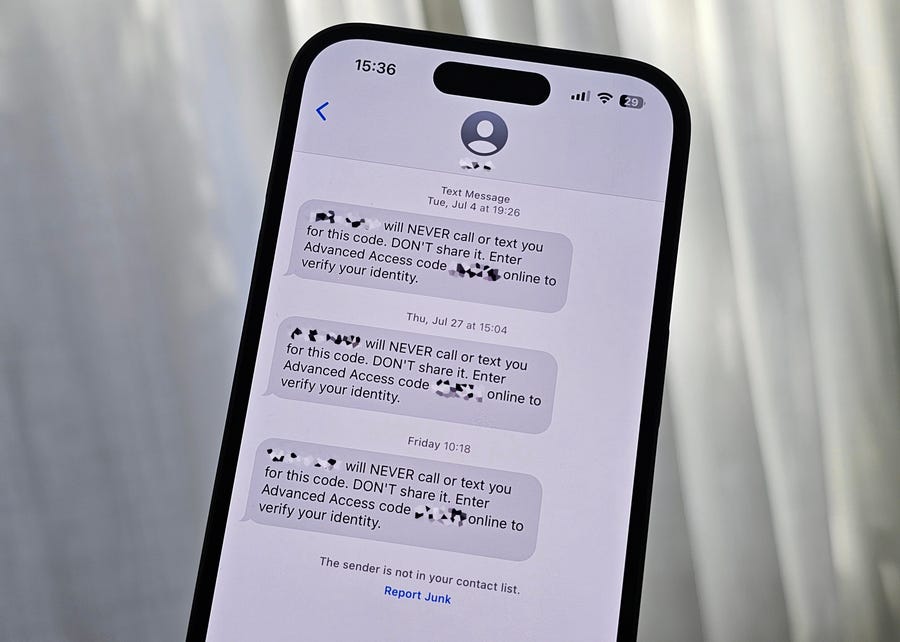
The verification codes you receive when attempting to sign in to your various accounts can quickly clutter up your text messages and email. Sure, you can always manually delete each code, but that takes too much time. iOS 17 now has a setting that automatically deletes your verification codes after you’ve entered them.
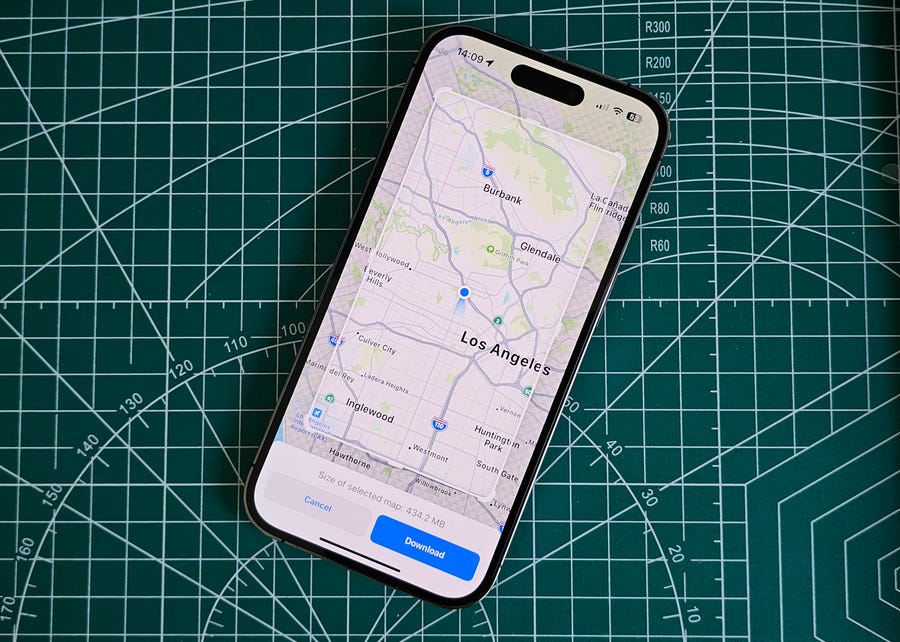
It took a while for this feature to pop up, but Apple now lets you download and use offline maps on the Maps application on iOS 17. Now you can more easily navigate roads, highways and tunnels — even if you don’t have internet.
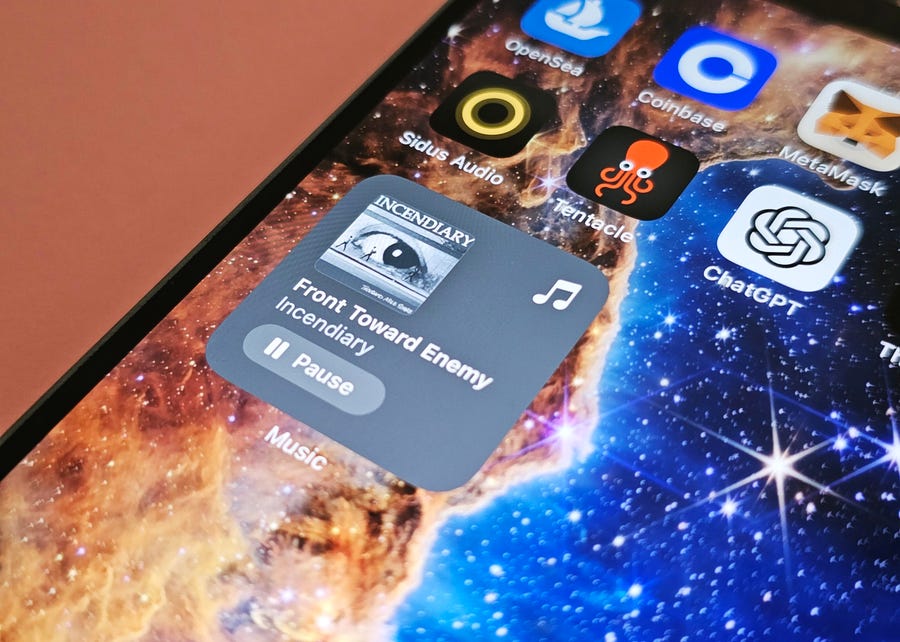
If you tap on a widget on iOS 16, you’ll be transported to the corresponding application. For example, if you tap on the weather widget, you go to the weather app. That makes sense.With iOS 17, however, a few widgets — including for Apple Music and Home — are interactive, meaning you can control the app directly from the widget. In the Apple Music widget, you can pause and play songs as well as browse through your recently played music. Once iOS 17 is released to the general public, you can expect third-party developers to integrate interactive widgets into their apps as well.
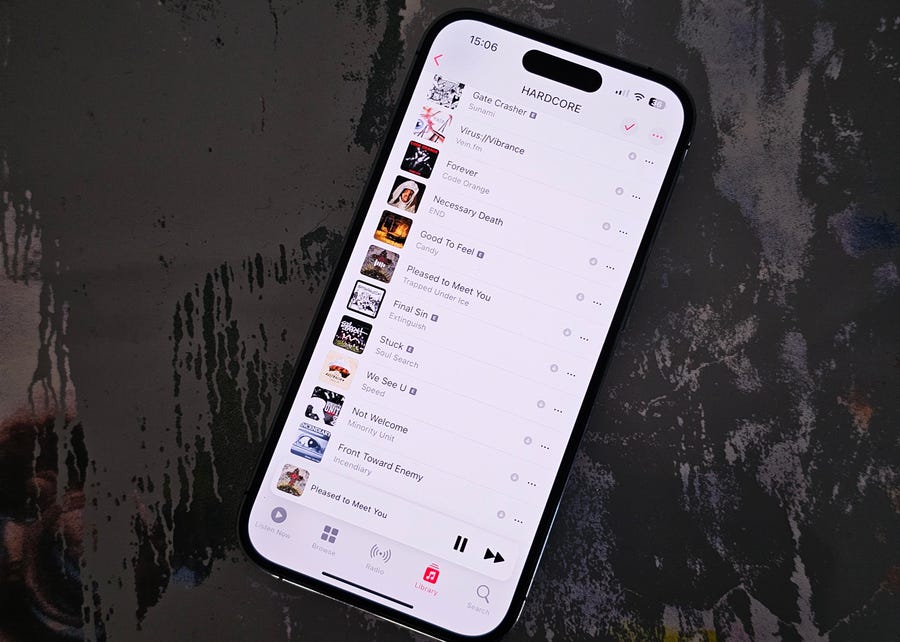
Instead of a jarring or silent jump from one song to another, you can now enable a cross-fade effect between songs in Apple Music on iOS 17. If you’re on aux duty, this feature is a must-have.
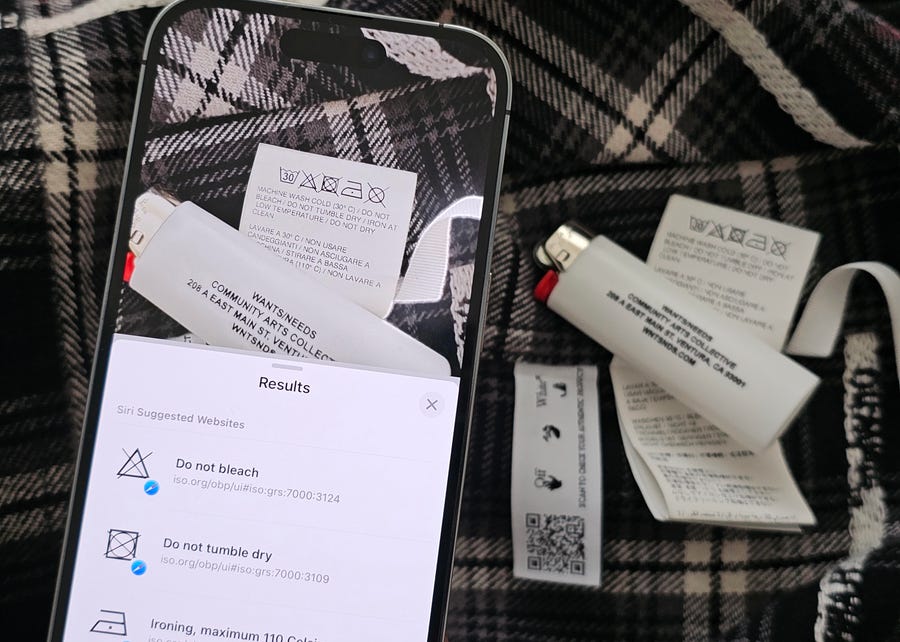
The laundry codes on your clothes are there to guide you when it comes to washing and drying, but if you have no idea what these symbols mean, they might as well be hieroglyphics.iOS 17 brings a new feature that allows you to quickly decipher laundry codes. All you need to do is take a photo of the tag and use Visual Look Up, a built-in Photos tool that can identify words, plants, monuments and other objects and provide you with information about them.
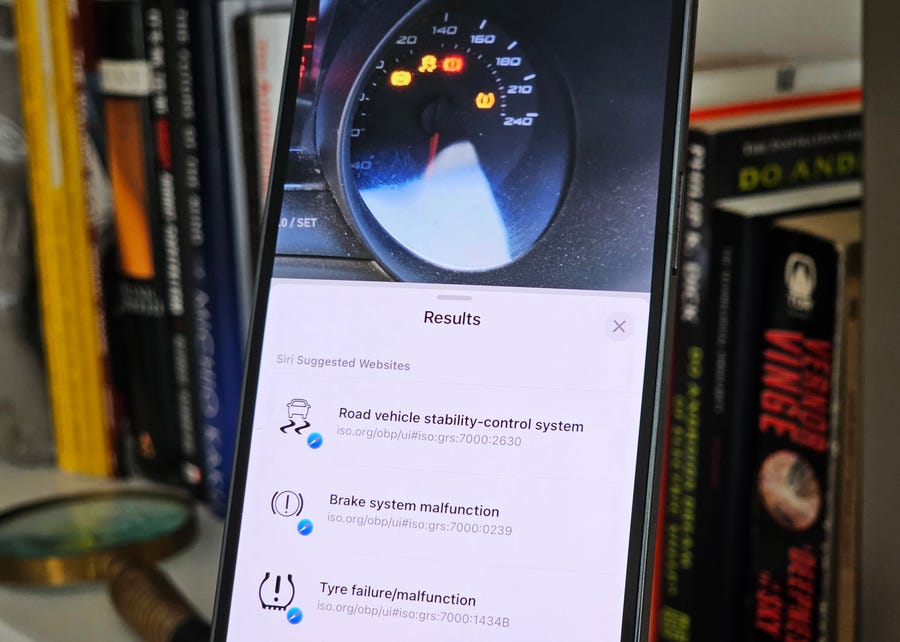
Visual Look Up doesn’t only identify laundry codes. It also can analyze any possible warning lights on the dashboard of your car. Again, all you need to do is take a photo and check out what Visual Look Up has to say about your warning lights. Maybe it’s time to get those brakes checked.
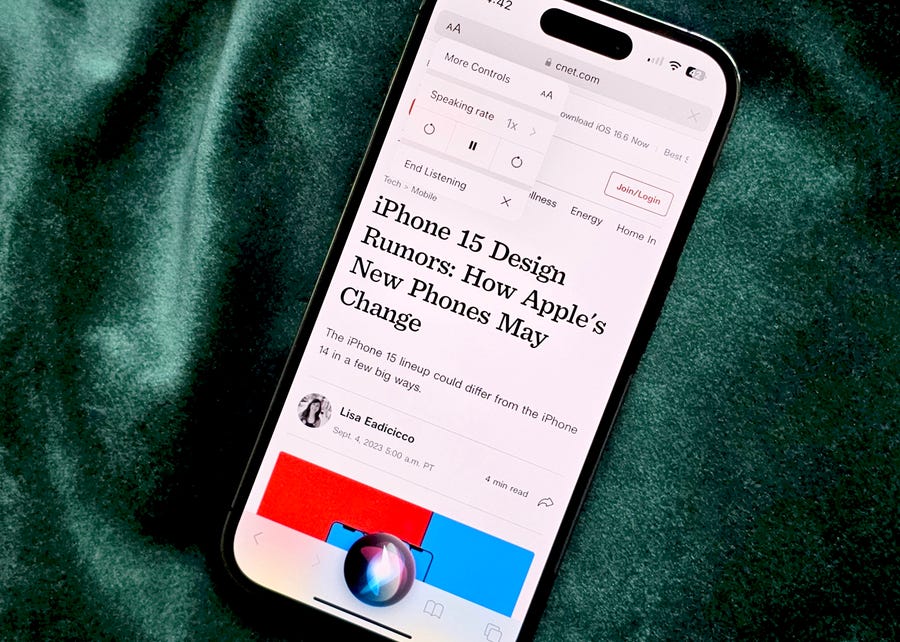
Over the last decade, podcasts have steadily risen in popularity, and for good reason. They’re easy to digest, and you can listen to a podcast anywhere, even while driving.If you’re a fan of podcasts, you’ll probably enjoy a new iOS 17 feature that lets you ask Siri to read news articles, informational sites or anything else in Safari out loud. No reading required.
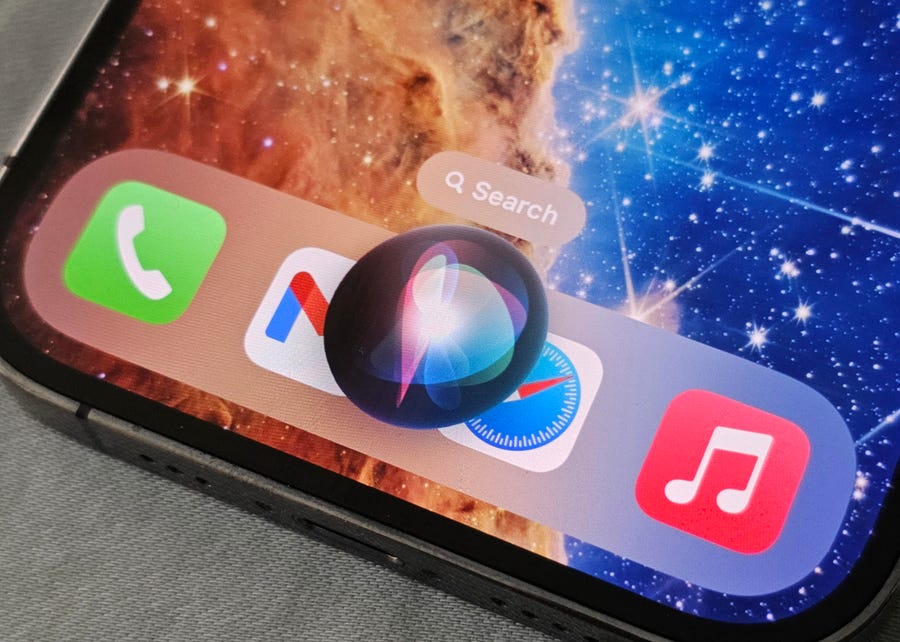
Siri has gotten a slight makeover on iOS 17, including two new features that will definitely change how you interact with the personal voice assistant.For starters, you no longer need to say, “Hey, Siri” to trigger Siri. You can just say, “Siri.” And you can ask Siri for back-to-back requests. For example, you could say something like, “Siri, give me directions to the gym and play my gym playlist.”
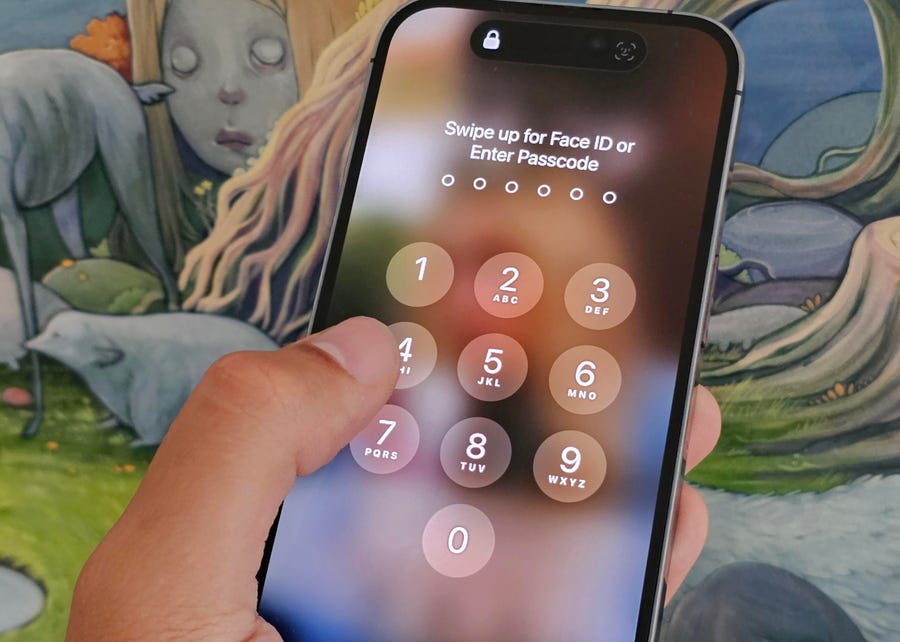
If you make a password change to one of your accounts, your new password is most likely stored in the cloud so that you don’t have to remember it. You can’t do the same with your iPhone passcode.Before iOS 17, if you forgot your passcode, your only way back in was to completely wipe your iPhone. Now, if you forget your passcode, you can use your old passcode to get in — but only for 48 hours after you create a new passcode. So act fast.
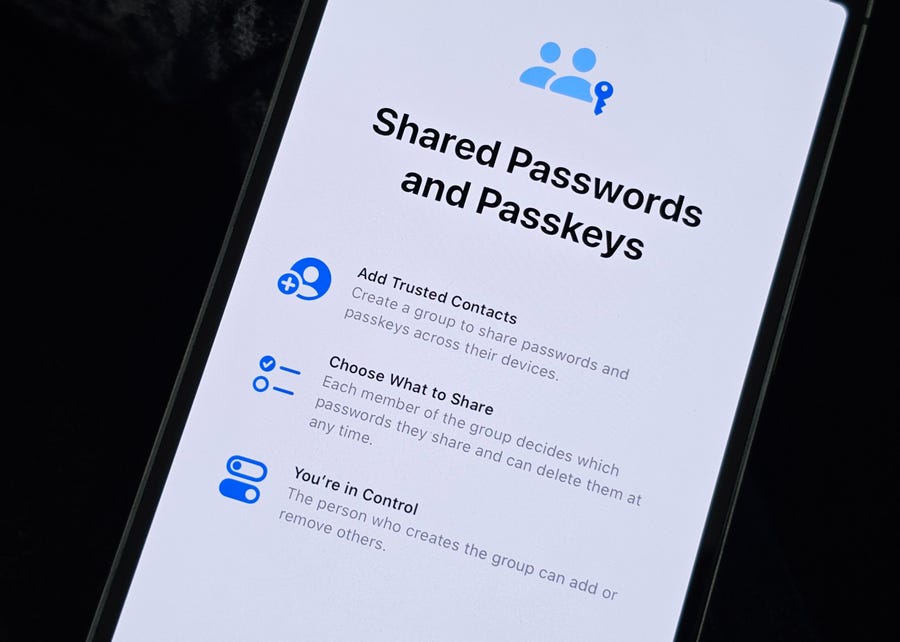
If you’re tired of copying and pasting passwords in your text messages to share with your loved ones, iOS 17 has a new feature that allows you to create a group to quickly share passwords and passkeys, across their devices.
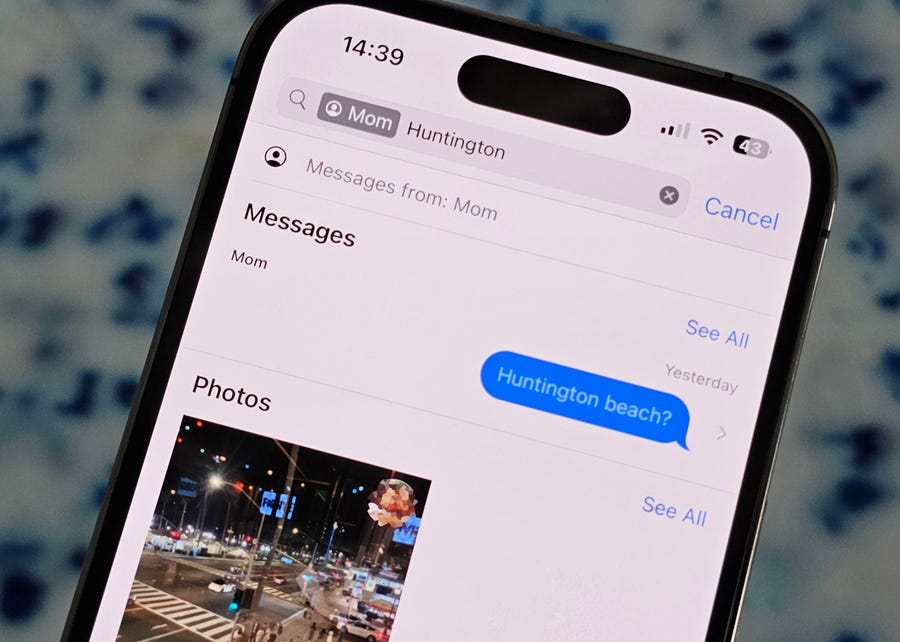
You need to find a specific message, in a thread filled with thousands of messages — on a phone with hundreds of message threads. Sure, you could scroll and scroll and scroll, but iOS 17 has made searching in the Messages app way more powerful.You can now filter your searches by contact, link, photo, location and more, to quickly find what you’re looking for.
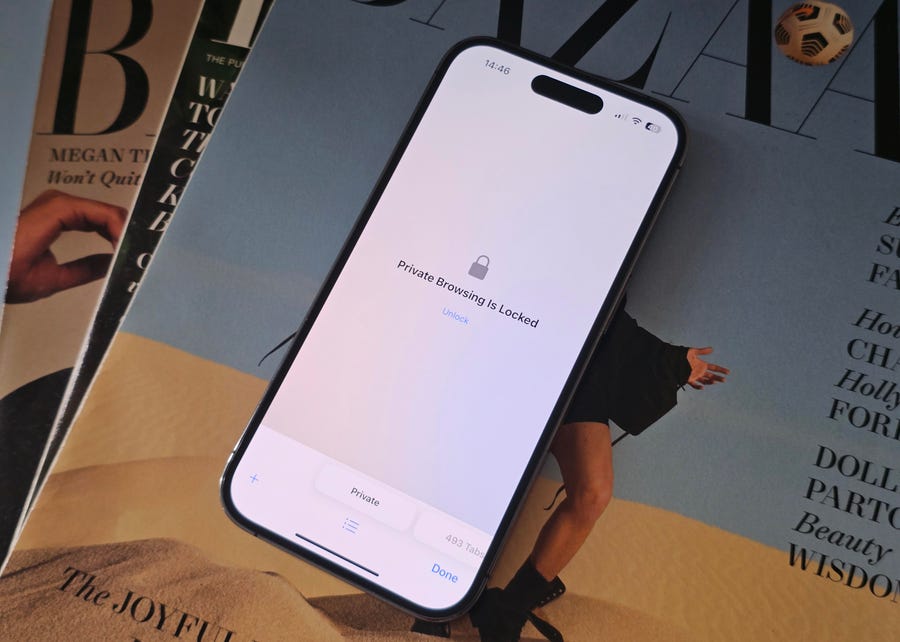
If you lend your phone to a family member, particularly a kid, you may well want to see what they’ve been browsing. Really sneaky kids might know that private browsing doesn’t record a history.On iOS 17, you can now enable a setting to require Face ID or a passcode to access private browsing in Safari.
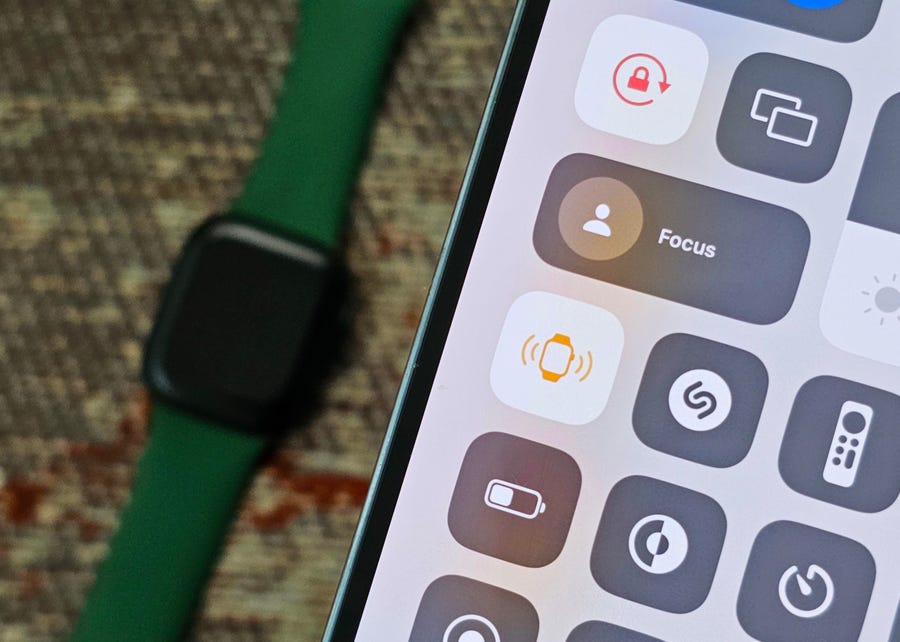
The Control Center on your iPhone is a hub where you can quickly take various actions with a single tap, like turning on your flashlight or enabling dark mode. With iOS 17, you’ll now also be able to ping your Apple Watch.

GIFs can be wildly distracting when you’re browsing through your phone — browse through an article (even ours sometimes) and sometimes you’ll be attacked with animations from all sides.If you’re looking to minimize the madness on your iPhone, iOS 17 now has a setting that allows you to stop GIFs from autoplaying in Safari.
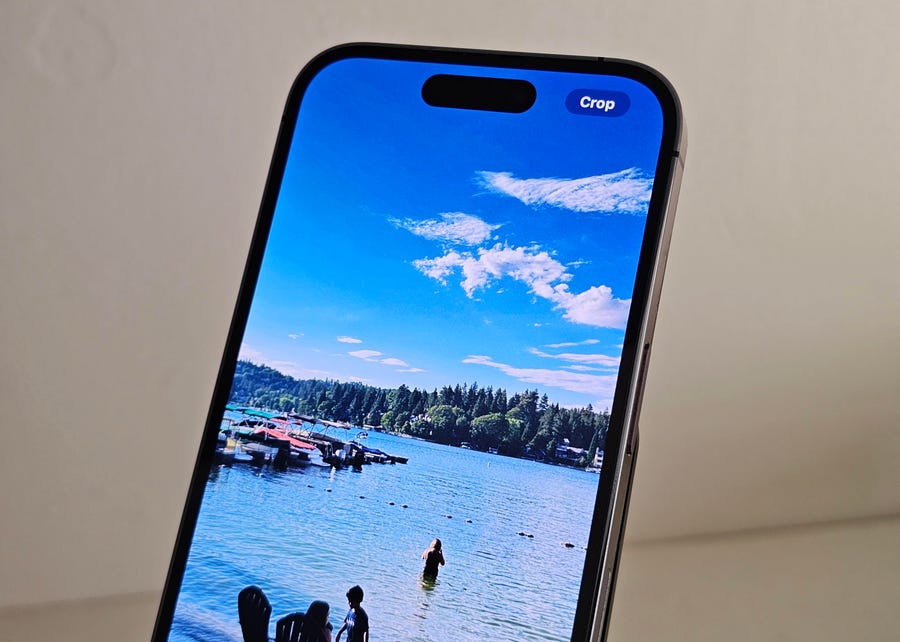
Cropping a photo or video is relatively simple on the iPhone — but the process is getting easier thanks to iOS 17. Instead of going into edit mode, you can now simply zoom into a photo and then hit the new Crop button that appears to resize an image to exactly what you see on your screen.
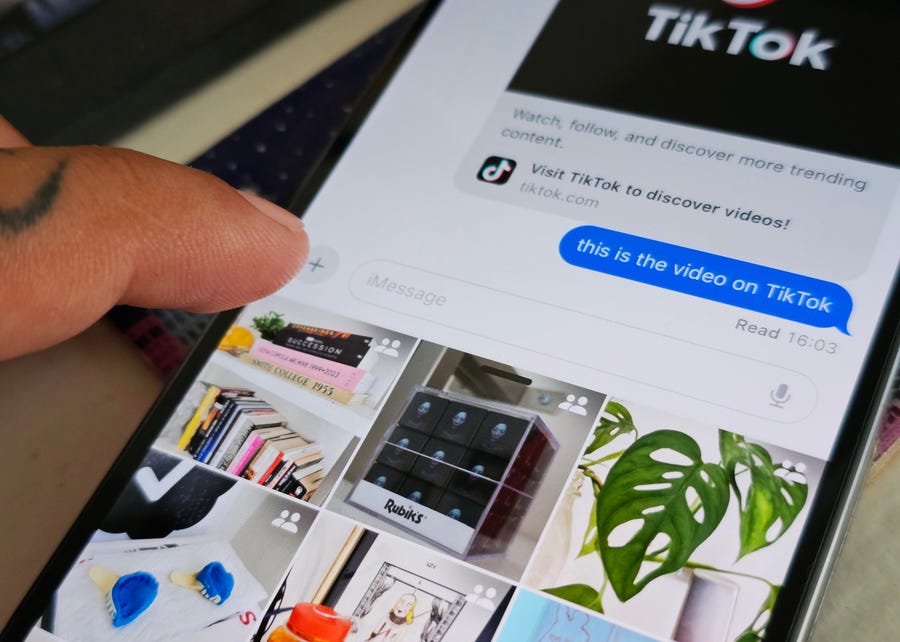
There’s a new way to access your applications directly from Messages, with a + icon that quickly brings up options like camera, stickers, location and more. However, if you’re only interested in accessing your photos, to send via text, you can just press and hold down on the + to quickly access your most recent photos.
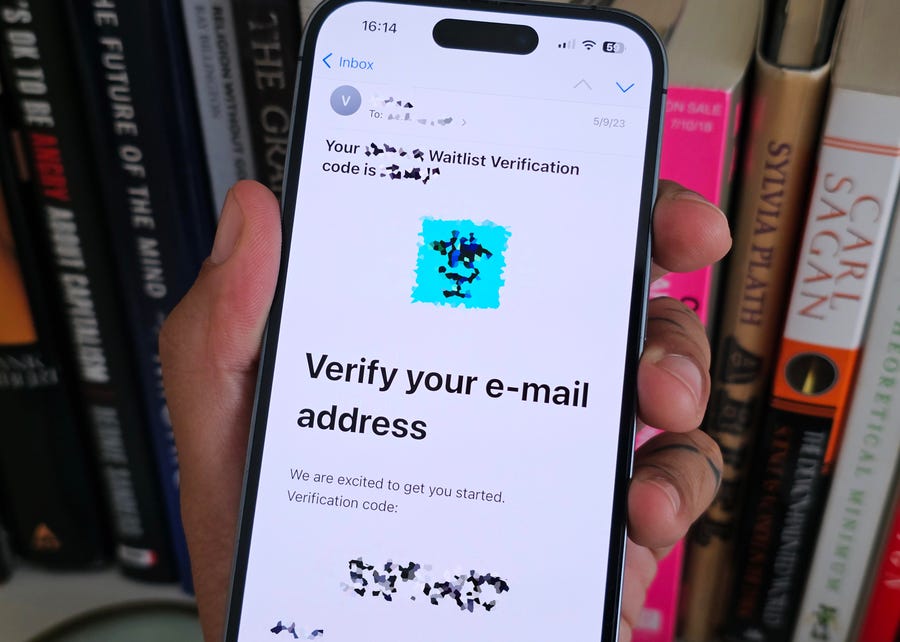
The same way that you can autofill text verification codes now from your keyboard, with iOS 17 you can also do that but with email verification codes. You must set up your email with the Mail app for this to work.